Here are some common questions employers and payroll administrators have about the Company View in ViewMyPaycheck.
The Company View lets ViewMyPaycheck administrators see employee paychecks after they're uploaded to ViewMyPaycheck and manage employee preferences.

Important! The Company View is available only to QuickBooks for Windows employers with administrator access to ViewMyPaycheck.
Want to see what else you can do in the Company View? Check out the ViewMyPaycheck Company View.
If you're the QuickBooks company payroll or realm administrator, then you'll be the primary administrator for ViewMyPaycheck. That means you can upload paychecks from QuickBooks to ViewMyPaycheck, invite others as a secondary administrator, see employee paychecks and other info in ViewMyPaycheck, and manage employee preferences. To confirm administrator access you need to sync your QuickBooks company with Intuit cloud services and connect to ViewMyPaycheck.
If you are not the primary administrator, you'll need to request administrator access from the primary administrator.
You must have administrator access to sign in to the ViewMyPaycheck Company View.
To do so:
- Go to https://paychecks.intuit.com/
- Click Sign In.
- Enter your Intuit user ID and password.
- Click Sign in.
No. If you're the Payroll Administrator for your QuickBooks company, you need to sync your QuickBooks company with Intuit cloud services and connect to ViewMyPaycheck.
If you're a secondary administrator, you need to request ViewMyPaycheck administrator access from the primary administrator.
If you're the QuickBooks company payroll adminstrator, you can give other users administrator access to ViewMyPaycheck. Here's how:
- Sign in to your QuickBooks company as the admin.
- Click Employees > Manage Payroll Cloud Services.
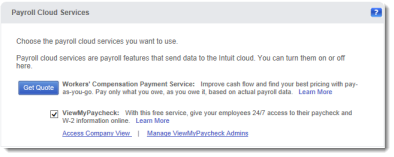
- In the Payroll Cloud Services window, make sure that the ViewMyPaycheck option is selected and then click Manage ViewMyPaycheck Admins.
- In the QuickBooks Payroll window, enter the same Intuit account ID and password that you used to sync your QuickBooks company and click Sign In.
- On the Manage users page, click Invite Others.
- Enter the email address, first and last name of the person you want to invite.
- Click Send.
- Close the confirmation window.
- Are you the Payroll Administrator for your QuickBooks company? Click here for instructions.
- Are you a secondary administrator? Click here for instructions.
- Are you an employee just trying to view your paychecks? Click here for instructions.
Yes! Click here for info on starting a chat session with an agent.